Put a pot in on way to work, have a hot meal when you get home

Solar Cookers to Consider
SUN OVEN®
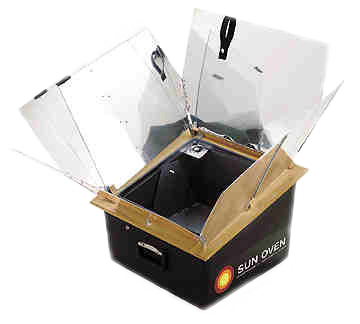 SolTech Designs acquired an All American SUN OVEN® w/Dehydrating and Accessories Package
to test. It is, per the company, "the world's most widely used solar
oven." It has been sold since 1986 and may be the most widely used solar
oven that is, per the company, "Just like your home oven, Reaches
Temperatures of 360° to 400°F!." For a try-it-after-you-buy-it review,
consider The All American SUN OVEN® Hands-on testing, technical and consumer report.
Although a 30-day money back offer for those not satisfied is available, SolTech spent more than 30 days testing it and kept it as a benchmark to compare with other solar ovens. To make the SUN OVEN® useful, it was pimped out (fixed), largely overcoming its limitations (see: Modifying the All American SUN OVEN®). Still, the potential remained to just start with a blank sheet of graph paper and try to do better, as in get it right conceptually, then built it in a manner others could duplicate. Those who most need to cook using sunshine are those who cannot afford a $300 SUN OVEN®.
Testing of the SUN OVEN® was done in a neighborhood made up of the working poor. Many who saw the cooking going on could see the potential and wanted one. Inevitably the "How much?" question arose, and inevitably eyes rolled when a three figure price was mentioned. At a two digit price, cooking by sunshine would be more common, more people would benefit, and the planet would be happier.
SolSource Parabolic Solar Cooker
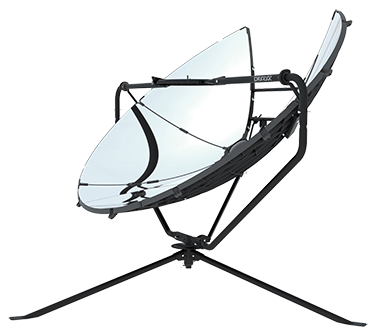 First, this is NOT a
slow cooker, but it is solar, and parabolic concentrators are
alternative to slow cooking by sun. They focus sunlight to a point
mostly on the bottom of the pot or frying pan or pressure cooker. Like a
gas stove, wood stove, or electric burner, these are hot-point cookers.
They can focus over 550°F (288°C) on the bottom of a pan when the sun
is high. You can pop corn or grill a steak or fry bacon and eggs. Still,
it is not as hot as a gas stove can be (900°C-1500°C), but it's hot
enough.
You can put a paper carton of eggs in a solar oven and get hard-baked eggs, but you can only fry using concentrated focused sunlight. A parabolic cooker can be used to quickly (compared to solar ovens, not gas burners) bring a pot to boil then put pot in a retention cooker to finish cooking and stay warm for evening meal.
Of course it is possible to live on some raw foods without cooking, and anything that can be hot-point cooked can be slow cooked/baked/boiled (okay, not popcorn, so almost anything). But in some cultures all cooking is by fire, by hot-point cooking, and use of an oven may be unknown. Getting hot-point cooks, whether in Tibet or Manhattan, to change cooking styles may be too much to expect.
A solar hot-point cooker may not be necessary, but it adds to
cooking versatility and even avid solar slow cooks could use one. Maybe
sauté onions before adding to the pot. On days when the clouds are
floating by, with patches of sunshine, a parabolic cooker (SolSource Parabolic Solar Cooker, Grill, and Stove,
$499 bucks) may be your only hope to fast cook something. Otherwise,
biomass cooking is an option, and is renewable solar, but the less
burning the better.
Baking is possible, like baking on a campfire is possible using a Dutch oven, but baking is not a hot-point cooker's strong point. Because the pot is always level, parabolic cookers will not work well for three to four hours after sunrise or before sunset especially with a short focal length such as the SolSource has. When the sun is at 30° elevation, much of the reflected light is shining down on the pot or pan. In winter they may only work at high noon or not at all in the higher latitudes (>38), so use is more limited than some slow cookers that can track the sun all the way down. My wife spent over an hour frying one pan of bacon one morning as focus was not on bottom of pan. Some focused light was shining down on the bacon, burning holes in it, and to prevent incineration the reflector had to be moved side to side continuously. Don't expect to use as designed with most of light focused on bottom of cookware except in afternoon due to very short focal length.
Best to start with a solar slow cooker and add a parabolic cooker if there is a need for high heat. What goes well with parabolic cookers, since they work best only in afternoon, are heat retention cookers, as a pot can be quickly brought to a boil and put in an insulated bag or box to finish cooking and still be warm enough to enjoy hours later. Use only thick bottomed cookware. I tried a thin graniteware pot from Walmart and a pocket of steam was created in the stew allowing the metal to overheat and a hole was burned through it.
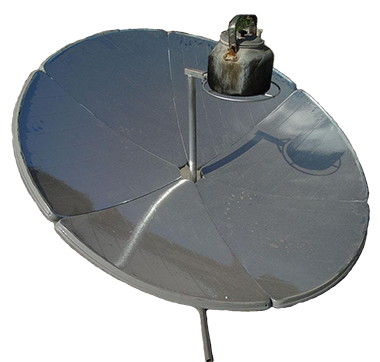
ECO-WORTHY Parabolic Solar Cooker
This is also not a slow cooker. I don't have one but have seen one. Where you see the parabolic dish pointing is where the sun needs to be, plus or minus a bit as the focal point moves across the bottom of whatever or as you adjust the dish to stand turnbuckle to move the focal point. The axis of rotation is at the base, unlike the SolSource's which is at the pot. Focal length is longer so most light hits bottom of cookware.
This parabolic cooker is cheap, compared to the SolSource (Eco-Worthy Parabolic Solar Cooker,
$119), as in cheaply made. As a DIY project, making a parabolic dish
would be challenging. The dish alone is basically what you are buying
and may well be worthy of the price. Modifying the stand would be a
doable project if turning the turnbuckle is too slow or too much effort.
With a custom stand, with axis of rotation at pot, and clamps to hold
panels together allowing for quick disassembly, something as or more
functional than the SolSource could be possible. Might fry bacon earlier
in the morning.
It has a 25 to about 70 degrees of adjustment for tracking sun compared to a 5°~60° elevation angle (sun elevation 85° to 30°) for the SolSource. Reflection is by foil tape. Max temperature claimed, above 400°F (204°C), is not crazy hot, but hot enough for most purposes.
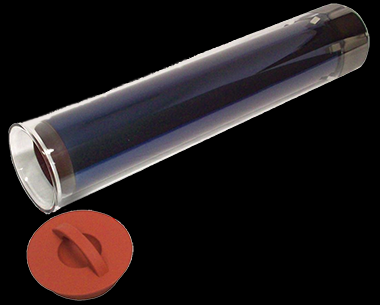
Rand's Evacuated Tube Cooker
This is both a solar slow and fast cooker. It is basically a 25" x 4 3/4" thermos bottle that holds up to a gallon of whatever (21 1/4" x 3 13/16" inside). The inner tube is black between the tubes and so the inside is washable and big enough to stick your arm down. Unlike thermos bottles, the neck is not narrowed, so you could think of it as a narrow glass pot. A silicon plug fits in the end but to hold liquids the tube would have to remain upright. Most of the heat is lost through the lid, so adding a foam plug will help.
Food on a metal tray (not included) could be inserted and the tube could remain horizontal to bake or broil, but if held vertically it will hold liquids. Without a reflector, temperatures over 200°F can be reached which makes it a solar slow cooker. With reflectors, temperatures over 500°F are achievable, making it a solar fast cooker. It does not come with a stand, tray, or reflectors of any sort, so users have to improvise. As a slow cooker, you could lean it against a stump in sunshine or inside a sunny window.
This cooker will last until broken, which could be a lifetime or
minutes after taking it out of the box. Although made of Pyrex type
glass, don't put it in cool water or put cold water in it if hot as it
is not the same quality as chemistry lab glassware. It resists thermal
breaking, but thermal shock can break it as can dropping it. Cost is
about $60.
Rand Solar Evacuated Glass Vacuum Tube Cooker.
Initial test was with nothing in the tube: just put in sun and temp went to 310°F with no reflector. Adding a liter of water and the raise in temperature was quite slow as while most of the sunshine went to heat the water, not much sunlight was shining on the tube. Adding reflectors will be needed to heat a liter or two in a reasonable time. With a liter of cold water in the bottom, reflectors, if too big, could thermal stress the glass. More testing underway.
One reason to add reflectors is to add protection from breakage. Although a long tray could be made by a metal shop, a series of metal cups could be hung from chain and used if the tube were vertical. If vertical, food could be hung on hooks inside. Add a bit of water in the bottom to steam the food. DIY reflectors can be made by applying foil tape to a bent surface or panels of cardboard or whatnot.
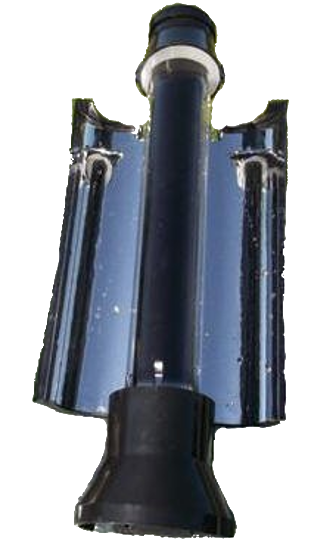
Solar Kettle Evacuated Tube Cooker
This is basically a solar thermos bottle. The cap unscrews and the
bottle hold 16 ounces. The cap is vented, but if not under pressure the
bottle is water tight, so after heating the panels fold in and it
becomes a thermos bottle. It can be both a solar slow and fast
cooker. It
is good for hot drinks, but add rice and water and get cooked rice or
whatever. Unlike thermos
bottles, the neck is not narrowed, so you could think of it as a narrow
glass pot. There is no metal tray and a stand holds it up, so it is
best
for heating/cooking liquidy foods or beverages.
The reflectors fold in to protect the glass tube, so it should
survive normal transport. Mine fell off a table, hit dirt (soil) and shattered. I paid for the vaccum, so what was left was trash. It weighs 2.6 lbs, so could fit in a backpack or in with
camping stuff. Although made of Pyrex type
glass, don't put it in the sun without liquid in it or pour cool water
in it if hot as it
is not the same quality as chemistry lab glassware. It resists thermal
breaking, but thermal shock can break it as can dropping it. Cost is
about $70. Solar Kettle Evacuated Glass Vacuum Tube Cooker
Filled with 82°F water, temperature was 113°F in 30 minutes and
144°F after an hour in the sun propped up facing the sun, which is nice
and warm if not on the scalding edge of too hot. So figure heating 16
oz. at about 60°F/hour. Filling with recently melted snow water would take about 3 hours to boil. Cooking starts at 180°F, so by the time it neared boiling, most stuff would be done.
If laid flat it becomes an omnidirectional slow cooker, so it could be laid in a back car window or on a moving boat deck if tied down. Minor leaking occurs, so lay on a small towel if that is of concern. Heating time is longer, but a few hours may be good enough. One hour flat, 82°F goes to 138°F, and another hour gives 176°F which is hot, so figure a 50°F/hour gain at midday in omnidirectional mode tapering off to zero near sunset. With the higher temperature there was significant leakage, about 2.5 oz, so when going omnidirectional elevate the cap end a bit if possible so there's an air bubble which will keep leakage to a few drops. Not as fast as a Bunsen burner, but the price is right. Out in nature, pick eatable plants in the morning, add water, salt and some rice, put on a rock in the sun, go for a day hike, and soups on for an evening meal.
It has less capacity than the Rand, but it's big enough to cook for
one or make a cup or two of tea. If you can carry a big backpack, why
not put one on the top opened and cook as you hike? For a two
course hot meal, or
meal and drink, consider getting two. Evacuated tubes are the only way
to solar boil with a compact design.
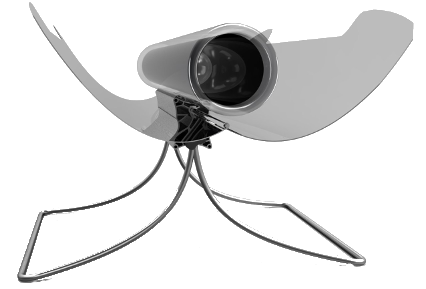 Gosun Solar Stove Sport Edition
I haven't tried one but I've seen it in use. This is an evacuated tube
cooker, so it can cook fast. It is meant to be used horizontal with
included tray that holds bits of food. It can be rotated 90 degrees so
the bottom is down and liquids can be put in it, but this option is
barely mentioned. With a cup or two of water in the bottom the upper
part could be so hot, while the bottom is still cold, that thermal
stress
could cause breakage. The design flaw is that the panels are too big to
allow
this potential use without some risk of thermal breakage, unlike the
Solar Kettle with relatively smaller panels. If filled to the
top with water to pasteurize it there wouldn't be hot/cold areas. The
company is working on a 'brew'
option, but won't be for sale until maybe fall of 2016. Basically this
is a small solar convection oven. If you put a pot of water in a gas
oven it would eventually boil, but not as quick as on a stove top, so
calling
this a stove is a misnomer. It's more a solar oven.
The tube length is 24 inches and inside diameter 2.1 inches, 25" x
8" folded, volume
being 40 oz, so a significant amount of food can be put in the tray.
Weight is 7 lbs. although the Amazon ad says 3.5 lbs. The reflectors
fold clam-like over the tube to protect it. The air temperature would
get hot quickly, but to cook fast the food should be in pieces on the
tray with lots of surface area. So bacon or hotdogs on the tray would
cook quickly
while a cup of water in the bottom would not heat quickly. To heat
water, silicone muffin cups could be set in a row on the tray and a few
ounces of fluid put in each. This would create the needed surface area.
Add a spoon of rice and whatnot in each and a meal would add up. Each
little pot could have something different, so a full course meal would
be possible. So a few cups, pieces of veggies and meat, maybe a corn on
the cob, and complete meal for one could be made. The silicone cup could
be used
as intended to bake muffins. Eggs would cook in the shell, with some
risk of exploding unless a pin hole is made in the big end, or put one
or
more in one of the cups for poached egg.
From
the Gosun site: "Keep in mind - GoSun will not rapidly boil water like a
standard stovetop. Instead, it will slowly bring water to boil (approx.
one hour of full sunlight for 1-2 cups of coffee). GoSun actually cooks
food much more rapidly than it takes to boil water, because of the
comparatively high density of liquids over food." The last sentence is
nonsense, as most foods sink in water and so are denser, so read 'volume' instead. It cooks small
chunks of food faster because the surface area is large and it's a convection
hot air oven. Overall, the site reaks of overselling. Errors add to the
red flags. Predictably, all published customer reviews are 5 star.
Still, I like this design. It could be mounted on a slow
moving vehicle, including a boat or even bicycle trailer, and food could
be slow cooked faster than other designs. The panels could just point
up to provide enough heat to cook a tube full of various foods just
laying on the tray or using the muffin cups. For one person it's big
enough to cook and keep foods hot for eating through the day. It could
cook or warm leftovers in the morning, loaded up with lunch/diner, and
provide a hot lunch, diner, and leftovers for breakfast. Anyone with a
place to set it in the sun could do the same, and pointing
reflectors at the sun would be an option for fast cooking. If space is
limited or portability needed, this design is a contender. Pointed up it
would work for absentee cooking, so this cooker is versatile, portable,
and potentially a fast cooker. If you understand the thermal shock
risk, it could be filled almost to the top with a quart of water and heated to 180°F to pasteurize it.
I have a Gosun Mini, but too many parts, 9 oz capacity, and it's no longer in production.
What goes with overselling? Overpricing. At $280 it is expensive. The
"Pro Pack" is $360. The site offers 20% off on first purchase (wait for the popup), but it's
still overpriced. Still, if it fits a need, you might have to break
down and buy it. I'm thinking bicycle touring pulling a trailer to which
the cooker could be mounted pointing up for omnidirectional cooking. In camp, it could be pointed to where
the sun will rise to cook/reheat breakfast. Could be opened during the day
for lunch/snacks, and after setting up camp late afternoon, diner would
be ready. So I might have to save up as this looks like the best option
for solar cooking on the move. GoSun Stove, Sport Edition, Portable, High Efficiency Solar Cooker - World's First Easy-to-Use Portable Solar Oven
Solavore Sport Solar Oven
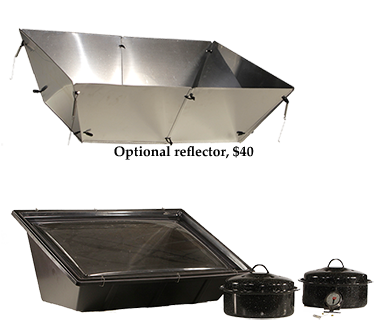 I
haven't tried one but I did get to see one. Consider it alternative to
the SUN OVEN®. At 9 lbs it weighs much less. The inside floor
dimension is 9 1/4 inches x 17 1/2 inches and holds two
10-inch pots (included). The sides and bottom have 1 inch of foam
insulation and the lid's double layer creates dead air space that
adds significant insulation, unlike the glass door of the SUN OVEN®.
Unlike the SUN OVEN® it is not a focusing oven and so doesn't have to
be repositioned every half hour or so. The optional reflector would help
and likely be needed on cold days when sun is low in temperate regions.
Like SUN OVEN®, the Solavore Sport is made in the USA, if that matters, and it is $230 or $270 with reflector including shipping in USA. The reflector may not be needed to slow cook on sunny days, but there will be partially sunny days and even on sunny days it would heat up faster with a reflector if faster is gooder. For absentee cooking, just remove the reflector so early and late sun still shines in. The company appears ethical, seems more purpose-driven than profit-driven. An independent review.
SolTech's El Cheapo
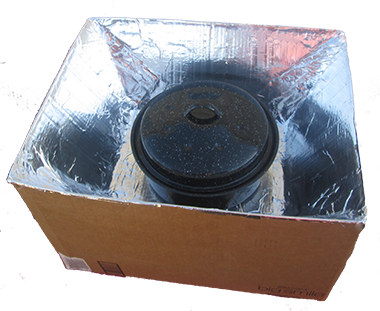 It
would be hard to design a panel cooker that didn't work. Take a
cardboard box, partly fill with wadded up newspaper, and push flaps in
to make a depression inside. Line with foil and voilà, an
insulated panel cooker a black pot in a bag can be set in. Put a piece
of glass on top, add a reflector to the back, and call it a solar box
oven. How cheap is Cheapo? If every component was bought at full retail,
we've talking maybe $15. But most parts can be sourced from el dumpster
by repurposing material that otherwise is at best recycled. Cardboard
with a bit of plastic, tape, foil, glue, and paper will work. Paint with
elastomeric roof coating, and El Cheapo will last for years.
El Cheapo works without external reflectors when the sun is high, as it always is in the tropics in the afternoon. In Alaska, in the winter, it won't work without some serious reflecting going on which would best be done by a different design, but some reflectors added will make it work in the mid-latitudes. The glazing can be a piece of glass (or two separated by a 3/4 inch spacer), or just frame the top edge and add plastic to top and bottom for some light, cheap, double glazing. Instructions for making El Cheapo are free as could be all the materials if found in a cupboard or in the garage.
CooKits
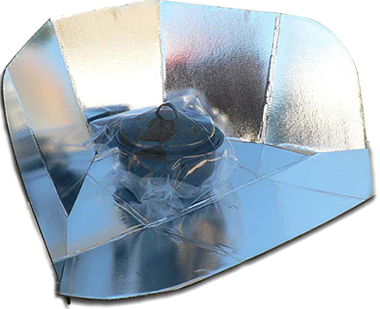 Alternative to solar box
and parabolic cookers are panel cookers that reflect light toward a
black pot in a bag or glass bowl. They work well enough, maybe 2/3 as
well as an insulated box cooker, but at 1/10th the cost (or less) they
are poor people (the 99%) friendly.
The CooKit is a bit more involved. You deed to trace a pattern on a piece of cardboard, cut out, make folds, and glue tin-foil to it. It will work as well or better, folds up for transport, and if you wear it out, make another.
Those who are DIY disabled or who have better things to do can even buy one from Solar Cookers International and proceeds will support gifting of CooKits to the needy. What's not to like? If you don't buy one, follow instructions on site and make your own.
The one I bought had extremely curved panel facets. I tried putting a heavy weight on it for a week but that didn't help. I rubbed the cardboard side with a wet sponge, put it folded inside a plastic bag, put a weight on it for several days, took the plastic off, put the weight back on for several days while it dried, and the panels were still curved, though not as severely, and it was useable. Still, if you buy one and get one like I got, I'd suggest you just make your own.
For citizen scientists, get or make one, then design your own and use the CooKit as a side by side point of comparison. Guess, then test, and publish your results (online).
The cooker can be rotated to follow the sun, but only the bottom edge can be tilted up when the sun is high in the sky. Not all of the reflected light is on the pot at any given time, so rotating the cooker frequently, as is needed with funnel type reflectors, is not necessary. Moving it every 2 to 3 hours would be enough.
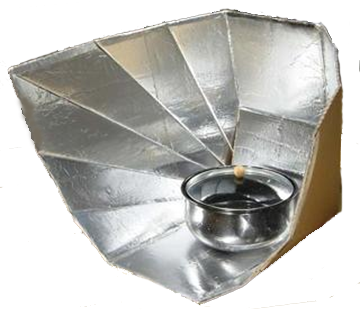 Fun-Panel Cooker
This is a funnel type reflector DIY project. Sunlight is funneled so higher temperatures are reached. Most all of the sunlight entering the funnel goes to the pot, but only if the funnel is pointing at the sun. This design has two positions, a low sun and a high sun position depending on where the pot is set.
A very long funnel reflector would gather more light, get the pot hotter, but would have to be adjusted more often to point at the sun, which involves more time and effort. The less focused the reflector, the less time is spent moving it to track the sun.
 Windshield Shade Cooker
Windshield shades are sold widely and turn up in thrift stores and
yard sales often. They can reflect heat out of a car or be shaped to
reflect heat towards a black pot. Making them can be quick and easy. If
pot is in a bag or glass bowl, they cook. The shades
can be bought readily and fashioning into a cooker is a minor DIY
project. Many possibilites exist and almost any effort will make a
cooker that works. More about the Windshield Shade Cooker.
All Season Solar Cooker
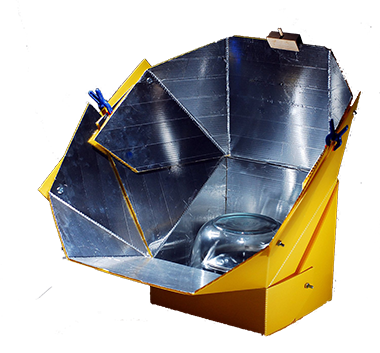 This is sort of a
hybrid between a panel cooker and a box oven cooker. It is a reflector
box with adjustable panels added. Turned on one side, the panels adjust
to reflect the early or late sun, and on the other side it adjusts to
collect the afternoon sun, even in the tropics. This is the "all season"
part of the design. It is even an "all place" cooker as it could be
used in Alaska or Ecuador. The pot would be covered by a bag or a glass
bowl, the "oven" part (pot and bowl not included, figure $30 more if you
don't already have). The cooker is light, made of plastic panels so
more durable than cardboard, and folds for portability. This is not best
used for absentee cooking as it is optimized to gather heat from Sol.
This is an excellent design offered at a reasonable price. No
unbelievable claims are made for it. For $95 (without accessories other
than a trivet) you get a versatile cooker. Without modification the
SUN OVEN® cannot track early or late sun, nor point straight up for use
in the tropics, and none of the other panel cookers do either, so the All Season Solar Cooker and Trivet
is a contender.
For the DIY enabled, plans are provided by the inventor: All Season Solar Cooker Plans
SUNFLAIR® Solar Oven

The Sunflair® Solar Oven
is a step up from a panel cooker as it has a plastic cover over the
panels. The "oven" created is uninsulated, but keeps wind from blowing
the warm air surrounding the pot away. If the pot were in a glass bowl,
the area for heat to dissipate would be much less, so the air around the
pot would be hotter. The main advantage of covering the reflectors is
more or bigger pots can be cooked. Comes with a rack to set pots on. For
$110 you get a bunch of accessories too.
The reflector material is like an auto windshield reflector. These turn up in Thrift Shops and yard sales, and something similar is DIYable. Half of the vinyl plastic cover is zippered on, so to put food in or remove, you unzip. Paper clamps could be used. Not as well as sewing it on and using a zipper, but would work well enough, and better than no cover.
As with the SUN OVEN®, you get more cooking room as it does
achieve "low" oven temperatures. With the SUN OVEN® you get "low
medium" oven temperatures, but with accessories the cost is $399 without
coming even close to being 4 times better. For $150 a Sunflair Solar Oven Deluxe version is offered. There is now a Mini version
that comes with one collapsable pot. For one or two persons, at $70, it's big enough.
On car trips and outings, this is our favorite grab and go design.
Hot Pot Solar Oven
 A non-DIY (for most) offering is the Hot Pot Solar Cooker, misnamed "Oven." The pot comes with it as well as the glass bowl, which functions as the "oven" (as would a bag).
It is not a box oven type. The panels are polished aluminum, fold up, and are durable. You get what you pay for and for $125 you get a somewhat more efficient reflector, a smaller folding size, and a much more durable solar panel cooker compared to a cardboard one. But using elastomeric roof coating (white stuff, goes on like paint) and coating cardboard will make it last and last. So even if durability is essential, DIY is an option.
Think of the Hot Pot as a premium panel cooker that is a bit more functional but costs more. Not poor people friendly, but those living in industrial society with Internet and a computer are really not poor, so those who want to be serious solar cookers might consider getting one. Having more than one type of solar cooker is an option.
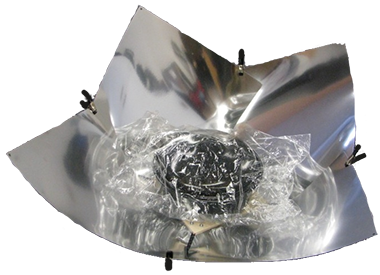 Copenhagen Solar Cooker
This type of panel cooker can be made or bought and fits in an envelope. It wins for small size, portability, light weight, and versatile shape. It is four squares of plastic such as place mats are made of with one surface reflective.
Originally it was made of place mats that were sold by Ikea. Four clips hold the panels in place and allow adjusting shape to better focus low or high sun. The original design involved lacing the panels to a square piece of plywood with a shoelace, but there are other possibilites.
For a simple panel cooker, the Copenhagen Solar Cooker is a contender. If DIY made, any stiff but flexible material covered in foil would work.
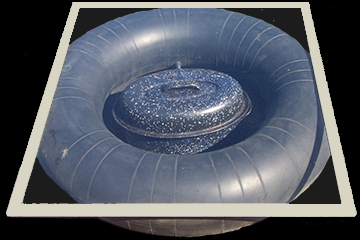 Inner Tube Solar Cooker
A finalist in the KISS competition is this repurposing of an old inner tube. Lay inner tube on cardboard to provide some insulation from the ground; perhaps add some straw or crumbled paper inside too. Patch any leaks if necessary. Put black pot in and cover with glazing. Lay a piece (or two) of glass on top if you have some or stretch some plastic over the top.
If using an old piece of glass, tape edges if you can. An old tire filled with crumbled paper would be less mobile and the seal with glazing would not be as good, but if you gotta cook, go solar and thrive.
Heat Retention Cooker
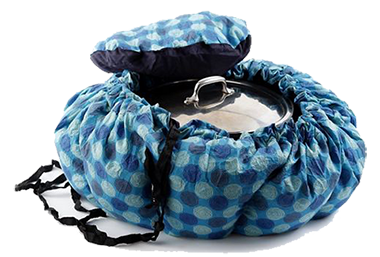 A heat retention
cooker is an insulated bag or container into which a pot of boiling
whatever is placed to finish cooking. The pot needs to boil for 5 to 15
minutes to get all the food up to boiling temperature, then the pot with
lid is put under wraps (a towel). The insulation could be a sleeping
bag, or special purpose bag. The one to get, so you don't have to make
something, is the Wonderbag
A heat retention
cooker is an insulated bag or container into which a pot of boiling
whatever is placed to finish cooking. The pot needs to boil for 5 to 15
minutes to get all the food up to boiling temperature, then the pot with
lid is put under wraps (a towel). The insulation could be a sleeping
bag, or special purpose bag. The one to get, so you don't have to make
something, is the Wonderbag. US customers who buy one donate one. This is the kind of tax I like to pay.
You put a towel in first just in case anything gets a little spilled, then the covered pot. Medium to large (the Granite Ware 7.5-Quart Stew Pot
fits well and pots much bigger wouldn't fit at all) is best, and pots
cook best if full as residual heat is what cooks the contents, so not
good for cooking small amounts.
While not itself a solar cooker, bringing a pot to boil for 5-15 minutes, then transferring it to an insulated bag to finish cooking frees up the solar cooker for other cooking. Solar panel cookers, once the pot has gotten hot in the noonday sun when sun is at optimal angle, basically act as a "Heat Absorption Cooker" that uses the later afternoon sun to stay hot enough to keep cooking. A solar panel cooker may never get the contents to boiling in the first place, so retention cookers are best used with solar box ovens or parabolic cookers (or any hot-point cooker).
Heat Retention Vaccum Thermal Slow Cooker
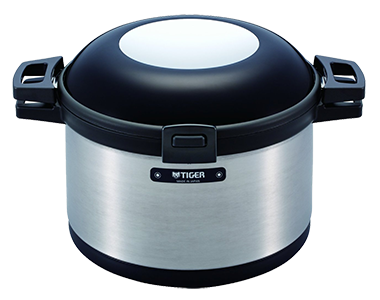 This is a 6 L (6.3 qt) inner pot with a glass lid that you bring to a boil on you parabolic or in a solar box oven, then put in the double walled outer vacuum pot. The lid of the outer is not vacuum insulated, so covering it with a towel or laying a pillow on it would help. The food will slow cook and stay hot (160°F for six hours or so). The parabolics or evacuated tubes can quickly (compared to an insulated box solar oven type) bring water to a boil. Put the inner pot in the outer for a family sized main course at dinner time.
On partly cloudy days a parabolic can heat the inner pot between clouds. If no sun, fire up a biomass rocket type stove (or unsustainable fossil-fueled stove) which is using recently stored solar energy.
The down side is $179 +shipping, and there are smaller ones for a bit less, but if solar cooking for a family, consider Non-Electric Thermal Slow Cooker 6.34qts / 6.0 L. Basically you're buying a vacuum, but the price of nothing can be worth it. Put some hot food or drink in a thermos and have something hot day and night.
Solar Electric Slow Cooking
 People
can "go solar" other than by direct solar cooking: Install a bunch of
solar PV panels to push electrons around, turning them into energy
slaves willing to do your bidding. Aside from turning motors or making
electronic gadgets light up, they can even be made to just make heat. An
electric blanket or heating pad may be just the thing at times, and for
some a necessity.
Batteries have a place, but are not needed by those willing to give their energy slaves a break when the sun isn't shining. In terms of doing the heavy lifting, this is an option to be seriously considered. When the sun don't shine, the adaptive would only need a modest battery bank to keep a few LED lights and maybe a laptop going. For the more mobile, solar charge AAA to D batteries and gadgets when the sun shines and forget the battery bank. But it would take a lot of AA batteries to cook a meal.
Electric solar cooking, nevertheless, is a serious contender. It is all about timing. If you have enough PV panels to supply your basic electric needs when the storm comes and it is dark, gloomy, and the days are short, then the rest of the time you'll have more electric than you actually need. If you have batteries enough to get by through sub-optimal times, then much of the time your battery bank will be fully recharged by mid morning.
Then what? Might as well use the surplus capacity. Plug in the electric waffle iron, or go all extravagant and pop corn on an electric burner. When the batteries are charged, think "time to vacuum" or "time to cut lumber on the table saw" or "time to do some electric cooking". Your energy slaves won't mind waiting.
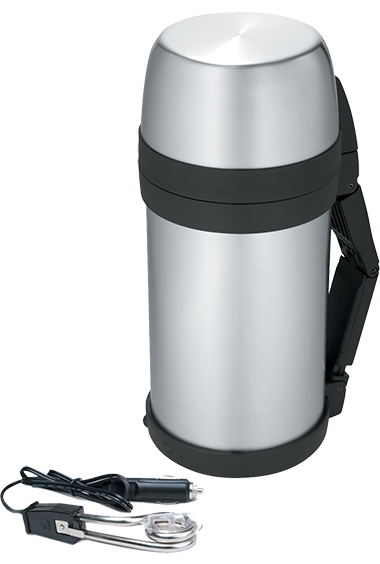
At times cooking with solar electric may not be an exercise in extravagance. To cook efficiently, think vacuum flask with a small heating element inside it. Most of the heat generated will heat the contents, and when near boiling temperatures are reached, the electric can stop heating and the contents will go on slow cooking for hours as a retention cooker. If using surplus PV power to do the initial heating, the sun could be long down and the flask could offer a hot meal, or even a hot breakfast already made.
Cost: about $34, Vacuum Insulated Wide Mouth Stainless Steel Bottle, 48-Ounce.
Combined with direct solar cooking, thermos bottle cooking can nearly provide 24/7 hot meals. Add a bit of solar electric cooking and solar could do it all—sustainably. Also good for cold. I use one for cold drinks. One tray of ice, add cold water, and still has ice the next day.
Biomass Wood Gas Stove: Plan B
In Arizona I have to plan on 45 days of no sun and 45 of partial sun per year. For no sun days, and in some areas 45 days of sun may be all you can expect, Plan B is needed. In the Southwest, dry wood is not hard to find and a campfire or masonry stove works well, if not efficiently. In the overcrowded world or in leave-no-trace areas, efficiency matters. Wood gas stoves are double walled with air vents top and bottom. Fuel is finger sized or smaller twigs. Small one-hand pruning shears can be used to make a small pile of biomass for one use or fill a bag for later use. The stove is filled first and a fire is started on top to burn down. Air comes in bottom outside, is heated, and comes into the inner top to mix with wood gas to produce the flame (and some soot). The amount of fuel put in, its density and height, determine how long it can burn. If any fuel remains it can be smothered and used later.
The stoves are light as they are usually used by hikers, but are good for solar backup too. They are lightweight, well made, and expensive, but for home use you can make them. For travel, premium is good, and the parts of a complete system are available separately. The custom pot happens to hold the stove, and the alcohol burner fits in the stove. The alcohol stove is backup for then wood is unavailable or too wet. They also make a quick fire for emergency use. Alcohol could be made at home through fermentation and distillation, so it is a special fuel for rare use.
Some sort of wind screen is needed should it be windy. These stoves should not be used indoors or in a tent without a chimmey. The kit shown includes fire starters for those who don't have two sticks to rub together. The total could come to $163, but DIY is cheaper. Solo Stove Pro Camping Stove Kit - Includes Solo Stove, Windscreen, Solo Alcohol Burner, Swedish FireSteel, Tinder-on-a-Rope.
There is a cheaper option that may be good enough. docooler Portable Stainless Steel Lightweight Wood Stove Solidified Alcohol Stove Outdoor Cooking Picnic BBQ Camping. An alcohol burner can be dropped in, so similar functionality.
Solar Cooking Accessories
 Oven Bags
If using a solar panel type cooker, you can use an oven bag as the
"oven" part. Cheap, reusable, and if using a retention cooker, just
leave in the bag, let air out, and put in. The black pot absorbs heat,
is the hottest part of the cooker, and the bag traps hot air to keep it
from being blown away. Just the pot alone will get warm but may not get
hot enough to cook. Buy bags locally or do as increasing numbers do and
if it avoids a trip, order from Amazon. Oven Cooking Bags-Large 16 in x 17.5 in. Or larger: 19x23-1/2 Oven Bag
Although reusable, if used regularly whenever the sun shines, figure going through 10 to 20 bags a year. Best for use with portable panel cookers that are not used often. For slightly better performance, elevate the pot so it is not in direct contact with the cooker and so light and hot air can reach the bottom of the pot. If solar cooking often, invest in multi-use Pyrex glass bowls as they will last until broken beyond hope of being glued back together.
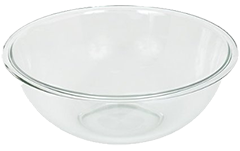 Glass Bowls
Alternative to bags is to put the pot under a glass bowl or
between two bowls which serves as the oven. To keep two bowls from
sliding one off the other, which may or may not be an issue, smear a
thin film of flexible glue (silicon, caulk, Goop, etc.) around the edge
of one or both and let dry. One bowl goes on the other to make the oven.
The best bowls are Pyrex type 4L ones available from local retailers
(Walmart, etc.) or from Amazon (Pyrex 4-Quart Mixing Bowl, Clear
) delivered to your door, which could save a shopping trip.
In a panel cooker the pot between two bowls is raised and some light can shine on the bottom. The air gap helps insulate pot from bottom of cooker.
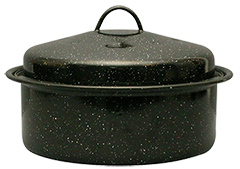
Cooking Pots
Black is the color, and "Granite Ware" has been around a long time
(over 125 years), is basically cheap metal covered in ceramic
porcelain. What you don't likely already have, you can get. Again, shop
local or for specific Granite Ware Amazon is alternative. There is only
one Granite Ware Pot that fits inside two 4L glass bowls, namely Granite Ware Covered Round Roaster as it has no handles. A smaller, shorter pot could fit under one bowl.
Cheaper enameled pots of more questionable durability can be had at Walmart et. al., but they will have handles that won't fit in glass bowls unless they are cut off. But if not using bowls, pots with handles work okay.
Silicone Pots
Black is good and Sunflare offers a colapsible pot. The avantage is they fit into a small package.
They are about $15 each. Collapsible Silicone Steamer.
You can steam veggies but also heat a can size of whatever, or make rice, et. al.
Probe Thermometer

Some cookers come with a dial thermometer. Some are even reasonably
accurate. Knowing the air temperature is of interest, but safety first,
and what you really want to know is the temperature of the food being
cooked. Sticking a thermometer in the food would involve opening the
bag/bowl/oven and letting the heat out as the thermometer likely can't
be seen if there is any condensation. With panel type cookers, there
will likely be no condensation as they typically don't get food hot
enough to boil. Still, a digital thermometer with a probe works and the
probe can be put in the oven/bag/bowl without baking the device itself.
If only using bags with a simple cooker, a simple $10 one piece probe thermometer will work.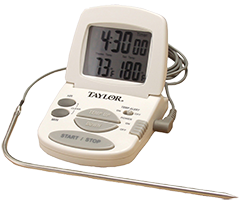
If using bowls, or a bowl with a lid, you'll need a thermometer with probe on a cable. To get a tight seal, use silicon sealant to make a gasket that is as thick as the cable. Then cut a notch for the cable. If using a box oven, drill or make a hole for the probe and cable if it doesn't fit between the door.
A Digital Cooking Thermometer/Timer
made in the USA is less than $17. The only part of the All American
SUN OVEN® not made in the USA is the cheap dial thermometer placed up
high where the food is not that reads 20F to 30F higher than actual
temperature. Going All American, however, would require changing the
"360° to 400°F" claim (1).
Dual Probe Thermometer
 One probe is good,
two allow you to know the oven temperature and food temperature. To not
have to go outside to check the temperatures, a remove that works up to
300 feet away is better. For premium knowledge, digital thermometers
used by BBQers is top of the line. If you spent hundreds already,
another $70 tells you what you need to know while doing other things. Maverick
ET-733 Long Range Digital Thermometer Set - Great for BBQ, Smoker,
Grill, Food and Oven - Dual Probe and Dual Temperature Monitoring -
NEWEST VERSION With a Larger Display and added Features. It says "for meat" but actually good for whatever.
It is important to calibrate thermometers. For any liquid thermometer or any with a probe, rolling boil some water. Check the current barometric pressure (the local weather service knows) and calculate the current boiling point of water (boiling point calculator). If your thermometer differs, it is in error. Add or subtract as needed, or if using a good digital thermometer, you can calibrate the probe to read accurately. Otherwise consider readings as plus or minus 20°F (10°C).
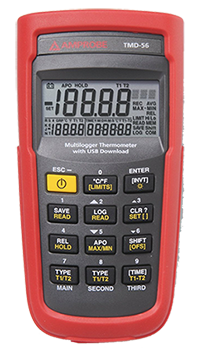
Citizen Scientist Thermometer
Citizen scientists do science the same way as those with PhD after their name (could and should anyway) by guessing, then testing. Would two layers of oven bag plastic work better/get a pot hotter than a single piece of glass as oven glazing? Testing would require two ovens otherwise the same. A dual probe thermometer is needed, one probe in each, but watching it and recording data minute by minute would prove taxing as the hours go by. Better, perhaps essential, is a data logging thermometer. The data can be downloaded to a PC and displayed as a graph.
Amprobe TMD-56 Multi-Logging Digital Thermometer, 0.05% Basic Accuracy
And, yes, it should be calibrated (see above Dual Probe Thermometer), and can be. Inquiring minds want to know.
Oven Mitts
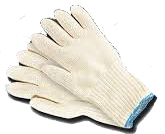 Even panel cookers make pots too hot to handle. A pair of oven gloves
or pot holders are needed.
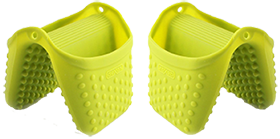
Pinch Grips
Putting gloves on and taking them off does involve some time and effort. Silicon Pinch Mitts
are an alternative.
Notes on Solar Slow Cooking
If warming food or drink (making sun tea) is what is needed, then solar works for that too. To warm, little more than sitting a black pot in a bag in the sun, or a foil wrapped hot dog on the dash of a parked car, is needed. Minimum cooking temperature for leftovers, however, is just one notch above pasteurization temperature, and leftovers should be heated to 165 °F (73.9 °C) or above to do in whatever may be growing within, so if just reheating, go for better than warm. Solar cooked food not eatten and left in the cooker, cools as the sun goes down. Foods that have been cooler than 125°F (52°C) for more than four hours may not be safe to eat.
Define "hot" as 165°F (73.9°C) at which temperature all food will slow cook. Rare done meat is 155°F, and fish and various seafoods cook as low as 145°F, while most vegetables and dry goods will (eventually) cook at 135°F. But 160°F is about minimum for pasteurizing water, so well done is safer. Since water boils at 212°F at sea level, that is as hot as moist foods can get. Any cooker that gets hotter merely raises the temperature of the food faster. Solar box ovens typically get hotter than 212°F, but still may take several hours to bring a pot to boil, hence, compared to a hot-point cooker (e.g. gas burner, parabolic reflector), all solar box ovens are slow cookers and solar panel cooker types are slower.
Knowing the elevation of the sun at different places and at a given time may be of interest given that solar cookers often can't point straight up (90 elevation) or at the horizon (0 elevation). To know sun elevation, you can use the NOAA Solar Calculator. Elevation (El) is given lower right once it knows place and time.
Solar Cooking Styles
The first solar oven I made, about 40 years ago, was a well insulated box oven with rear opening oven door and a large mathematically perfect cardboard funnel reflector, about 5 feet long, that funneled light through two pieces of separated glass about 14 inches square. The problem was the inner glass was shattered by the heat. I replaced and the second one shattered. I then stretched chicken wire under the inner glass to keep the pieces in place when it cracked from the oven-like heat. The downside was it had to track the sun, so all I ever made in it was cookies as I wasn't patient enough to cook a big pot of beans or stew.
So manually track the sun (enthusiast style) or go all high tech and make a tracking system that will actually allow you to sun burn your food (hyper-enthusiast style), or......the other style of solar cooking is "absentee cooking" where the slow cooker is pointed to where the sun is going to be around noon, and other than putting in a pot in the morning and taking in out some hours later (3 to 12), the cook has nothing to do—they can go do something else, like get a job. Even enthusiasts, given time, will become absentee solar cooks and perform their bouts of enthusiast cooking on special occasions.
Three or more cheers for solar SLOOOOOOOOOOOOOOW cooking.
So to decide which solar slow cooker to get or make, decide what your style is. If absentee, then avoid those that go for high temperature by focusing sunlight. The SUN OVEN® is somewhat focused but will do absentee cooking. The side panels, however, shade the opening from early and late sun, so food, after cooking, starts cooling off when the side panel begins to shade the opening. For absentee cooking, reflectors should be optimized to gather heat for a cooker that does not track the sun.
For more: Solar Cookers: How to make, use, and enjoy.pdf

